JSF: PrimeFaces: JPA: Multiple Persistence Units

Problem

When using multiple JPA persistent units inside the file persistence.xml you can run into troubles when your entities have the same name. A exception message such a follow is an indicator of that there is a problem: “javax.annotation.processing.FilterException: Attempt to recreate a file …”


Solution

Set the following property from

<exclude-unlisted-classes>false</exclude-unlisted-classes>

to

<exclude-unlisted-classes>true</exclude-unlisted-classes>
Share
Leave a comment

JSF: PrimeFaces: Basic Custom Composite Component

The following describe how to create a basic custom composite component in JSF 2.0+ for Primefaces. The method of using rendering classes, back beans, type classes, and others are not included in this tutorial. Please note that the IDE used for programming is NetBeans 7.4


  1. Create a Folder
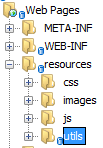
    Create a subfolder into the resources folder as show in the following image. In this case, we call this folder “utils”.
    create_folder
  2. Create a XHTML File
    Inside the folder utils, lets cretae a XHTML file. This file will contain our custom composite component.
    In this case, we call this file “displaySuperValue.xhtml”
  3. File “displaySuperValue.xhtml” Content
    Copy and Paste this code example:

    <?xml version="1.0" encoding="UTF-8"?>
    <!DOCTYPE html>
    <html xmlns="http://www.w3.org/1999/xhtml"	  	 
    	 xmlns:h="http://xmlns.jcp.org/jsf/html"
    	 xmlns:composite="http://java.sun.com/jsf/composite">
    	<head><title>Show Super Value</title></head>
    	<body>
    
    	  <composite:interface>
    	    <composite:attribute name="supervalue" required ="true" />
    	  </composite:interface>	
    
    	  <composite:implementation>			
    	    <hShockutputText value="This is SuPeR: #{cc.attrs.supervalue}" />
    	  </composite:implementation>
    
    	</body>
    </html>
  4. About Your Custom Component
    At the beginning of your file, you will need to include the composite namespace if the IDE did not include it automatically. Just add the following line:

    xmlns:composite=”http://java.sun.com/jsf/composite”

    While the interface tag should hold all the attributes of your custom tag, the implementation tag should hold all your web interface script. In order use the attributes declared inside the interface tag, you need to use the “cc” bean provided by JSF. This bean is based on the UIComponent class.
    cc bean

  5. Implementing Your Custom Composite Component
    Go to the XHTML file which you wish to use your custom composite component.
    Start typing as you normally would do when writing a JSF tag by typing the name of the folder you created under the resources folder as show below:
    listWhile “utils” is the name of the folder, “displaySuperValue” is the name of the XHTML file you created.
    As you keep typing, when using the space, the NetBeans IDE will display a list of all the default attributes including those you created inside the interface tag. Normally, the NetBeans IDE should include the namespace that will allow you to access to your custom component; however, if the IDE doesn’t include the namespace, just add the following namespace and the problem should be solved:

    xmlns:utils="http://xmlns.jcp.org/jsf/composite/utils"
Share
Leave a comment

PrimeFaces: Using Included JQuery

PrimeFaces is already shipped with the jQuery bundled; therefore, there is no need to include the jQuery script.

However, when in a page there are no PrimeFaces components that use jQuery then jQuery will not be automatically included.

To go around this issue, you must use the following line inside the <h:head> tag:

<hShockutputScript library="primefaces" name="jquery/jquery.js" />
Share
Leave a comment

NetBeans: PrimeFaces: Adding Theme to Project

Adding a theme to your PrimeFaces is simple:

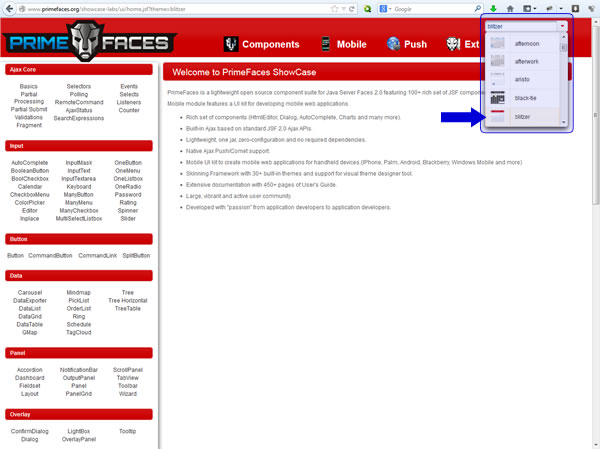
  1. Go to the PrimeFaces theme Showcase Labs so you can pick which theme you wish to use (remember the name of the theme):
    http://www.primefaces.org/showcase-labs/ui/home.jsf?theme=blitzerprimefacespagetheme
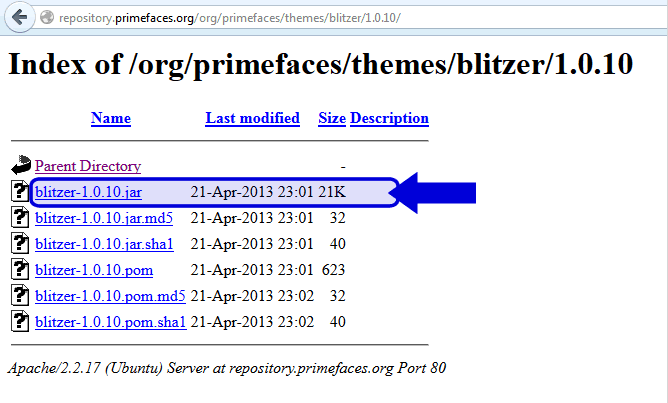
  2. Go to the PrimeFaces theme repository: http://repository.primefaces.org/org/primefaces/themes
  3. Using the name of the theme you wish to use, go inside the theme folder and then go into the version you wish to use.
  4. Download the jar file anywhere you wish
    primefacespagethemefolder
  5. Open NetBeans and go into your project
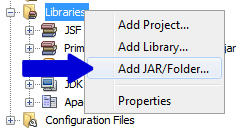
  6. Do right-click “Libraries” folder and select “Ad JAR/Folder”
    NetBeans_Libraries_AddJar
  7. Select the JAR file
  8. Your jar file should show up under the Libraries folder
  9. Next, go into the folder WEB-INF and open the file web.xml
  10. Add the following xml code into this file
    <context-param>
    	<param-name>primefaces.THEME</param-name>
    	<param-value>blitzer</param-value>
    </context-param>
  11. Run and/or deploy the website. Done!
Share
Leave a comment