In this tutorial, I will provide you with the basics on how to create a Metric Alert using ARM Templates in Blueprints.
In this case, our metric alert is used to indicate when a pipeline fails to run in an Azure Data Factory.
Step 1: Create an Action Group
Before we create a metric alert, we need to create an action group. In this action group, we will indicate that we wish to send our notifications to a mailbox as an email. We could setup an SMS or even trigger a webhook but such features are not cover in this tutorial.
To create an action group using an ARM Template, there are two ways to approach it.
The first method is to create the Action Group in the portal and then extract the ARM template from the portal.
Step 1A: Extract Action Group ARM Template using the portal
In the portal, search for Monitor. Next, in the Monitor, inside the left side panel, click on Alerts.
In the right panel, search for the ![]() Manage actions button. Then, click on the button + Action group.
Manage actions button. Then, click on the button + Action group.
Select your subscription and resource group, fill in the Action group name and display name and press Next Notifications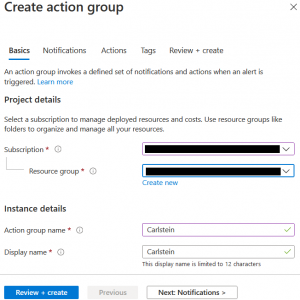 .
.
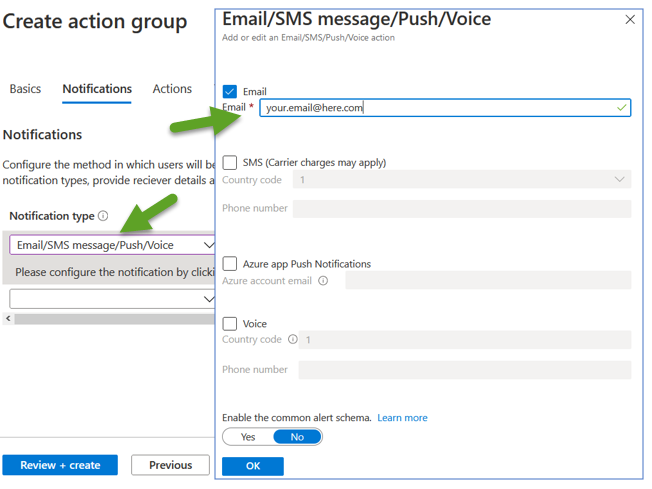
In notification, select Email/SMS message/Push/Voice. A panel will slide in, check the Email checkbox and type your email. Click OK when you are done.
 Don’t forget to type the name of the action group and create the action group.
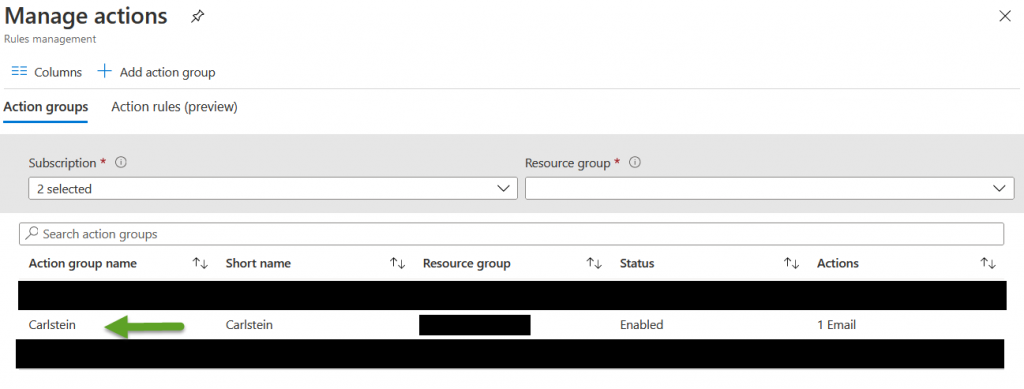
 If everything goes well, your new action group will show up in the list:
Step 1B: Extract ARM Template from Resource Group
Search for Resource Groups. In Resource Groups, select your resource group.
On the left side panel, scroll down until you find the Automation section, then press ![]() Export template.
Export template.
After the portal ends creating the template, search for microsoft.insights/actionGroups. You will notices that there could be more than one under the property resources.
The one that you are interested has a particular value for the name property, in our case is: “name”: “[parameters(‘actionGroups_Carlstein_name’)]”.
Notices that the name is setup by a parameter that has the name we gave to the action group.
Let take a look to the whole resource:
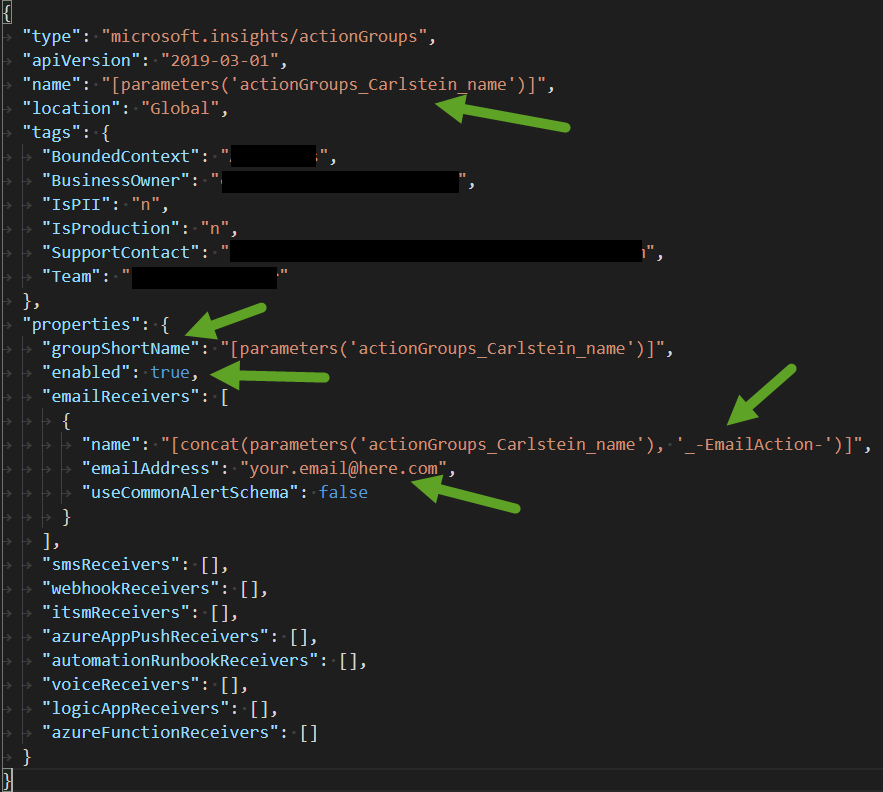 The arrows indicate what are the properties we setup in the portal. Please notices that the location is Global, this resource can only exists in this location.
Next, in your blueprint, you only need to include this resource inside your resources array.
Step 2: Set Inbox to Receive Emails from Microsoft
Some inboxes are setup to receive only internal emails, block external emails that are not part of a whitelist, or just label them as spam.
So, make sure that these three emails are accepted by your inbox:
- azure-noreply@microsoft.com
- azureemail-noreply@microsoft.com
- alerts-noreply@mail.windowsazure.com
Step 3: Set Inbox to Receive Emails from Microsoft
In the portal, search for Data Factories and select your data factory.
On the right side, you will find a button that says Author & Monitor.
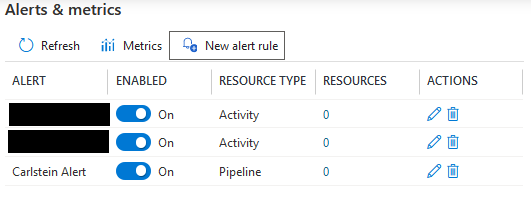
 Next, you press on Monitor and Alert & metrics as shown below.

In this section, press ![]() New alert rule. Give a name, description and severity level to your alert.
New alert rule. Give a name, description and severity level to your alert.
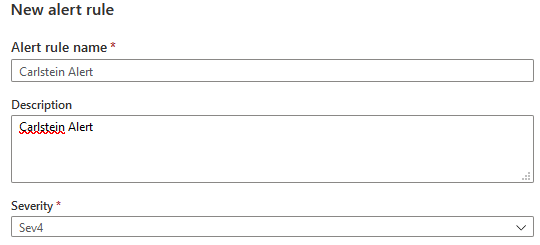 These are the level of severity:
- Sev 0 = Critical
- Sev 1 = Error
- Sev 2 = Warning
- Sev 3 = Informational
- Sev 4 = Verbose
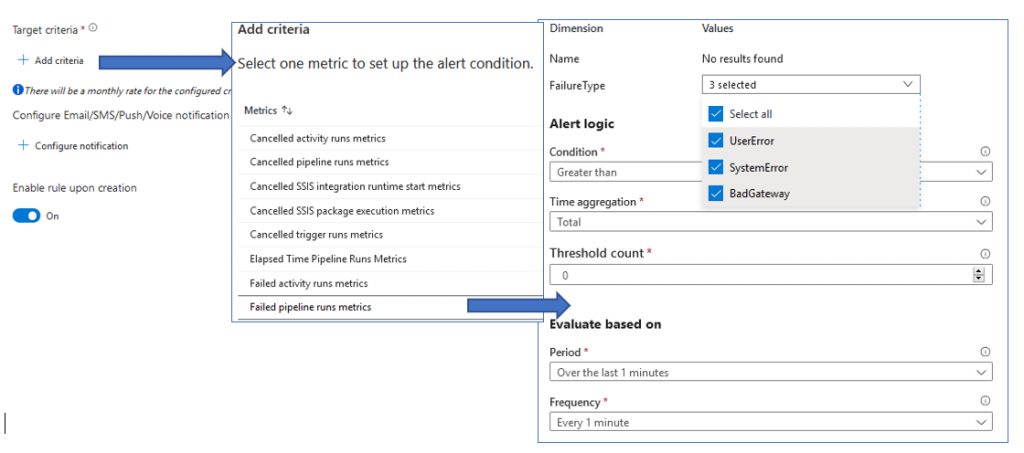
Select + Add criteria, pick the criteria you wish, in our case is Failed pipeline runs metrics.
Then, pick the type of failures you wish to consider, the conditions for which it should trigger, and the period of time and frequency that the condition will be evaluated.
Next, press + Configure notification, in the slide panel, check on the Use existing and select the action group you created.
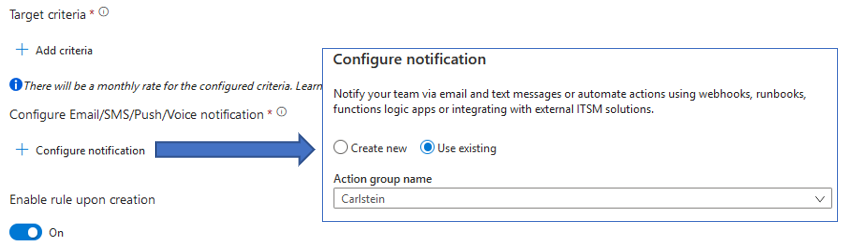
Note: You can also create the action group directly from this panel; however, depending of the policies applied to your account, you might be restricted to do so and only be able to do it via the Monitor section or an ARM template.
When you finish, you will see your new alert.
 Note: In Azure Data Factory, the alerts and metrics are not triggered when running in Debugging Mode. The only way to test them is by publishing and have some way to make the pipeline fail. In our case, we can set a variable in the pipeline of some type and in an activity try to setup a value that doesn’t match that time in order to trigger a failure.
Lets take a look to the ARM template for this. Search for the resource Microsoft.Insights/metricalerts.
In the first part of this resource we have:
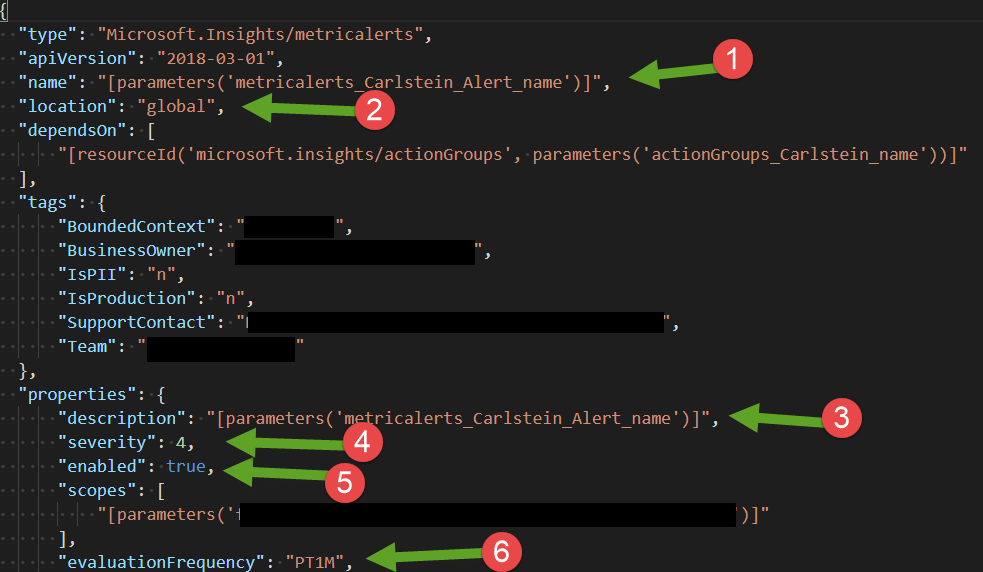
- The name we used to give the alert
- The location which is always global
- The description
- The level of severity
- If the alert is enabled or not
- The frequency. In this case PT1M means every 1 minute
Notices that we have a dependency:
"dependsOn": [
      "[resourceId('microsoft.insights/actionGroups', parameters('actionGroups_Carlstein_name'))]"
  ]
This means that before this metric alert is created, it will wait until the action group is created.
Next, we have the rest of this ARM template:
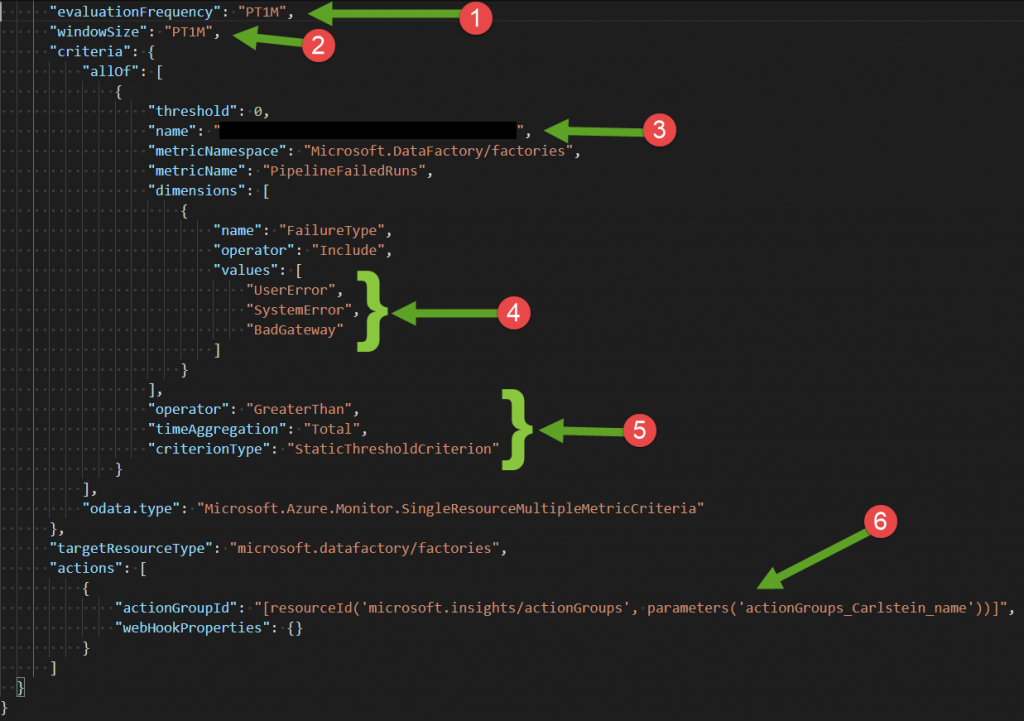 For which we have:
- This is the evaluation frequency, which we discussed previously.
- The property windowSize is the Period which as the value PT1M
- The name here has a auto-generated GUID but you can pick another name if you wish
- Here we have the three type of failures that we are listening to.
- Here is the criteria under Alert logic
- Finally, we provide the action group id that we will be using for this alert.
So, in this way, you can create your own blueprint to recreate your resources.
