There are better options than using one array for names and another array for resources.

I encounter a piece of code which bugs me:

int[] images = {
		R.drawable.ic_image_1, R.drawable.ic_image_2, R.drawable.ic_image_3, R.drawable.ic_image_4, R.drawable.ic_image_5
		R.drawable.ic_image_6, R.drawable.ic_image_7, R.drawable.ic_image_8, R.drawable.ic_image_9, R.drawable.ic_image_10
};

String[] imagesNames = {
	"Image One", "Image Two", "Image Three", "Image Four", "Image Five", 
	"Image Six", "Image Seven", "Image Eight", "Image Nine", "Image Ten"
};

Later on, these two array are pass to all kind of method and constructors together for example:

    @Override
    public void onBindViewHolder(MasonryView holder, int position) {
        holder.textView.setText(imagesNames[position]);
        holder.imageView.setImageResource(images[position]);
    }

While this is correct, light on the memory, and use fewer CPU resources (less like of code run, smaller Big O), it welcomes all short of possible bugs, for example, lets say you add an image and forgot to add a name. You get mismatch arrays. Your code breaks. This issue is common if you are building these arrays dynamically; therefore, why not keeping the information together?

There are different ways to handle this

One way would be to create a class which holds these two items (image and image name). Then, you can create an array of objects.

private class Resource {
	public int image;
	public String name;
	Resource(String name, int image){
		this.image = image;
		this.name = name;
	}
}

Resource[] resources = {
	new Resources("Image One", R.drawable.ic_image_1),
	new Resources("Image Two", R.drawable.ic_image_2),
	new Resources("Image Three", R.drawable.ic_image_3),
	...
	new Resources("Image Ten", R.drawable.ic_image_10),
}

Then, you can iterate them:

    @Override
    public void onBindViewHolder(MasonryView holder, int position) {
        holder.textView.setText(resources[position].name);
	    holder.imageView.setImageResource(resources[position].image);
    }

Now, this is cleaner than before.

However, lets say you don’t wish to use a (public or private) class, then what to do? Well, you could use our old friend LinkedHashMap, which works like a HashMap; however, it keeps the order in which the elements were inserted into it.

LinkedHashMap = new LinkedHashMap<String, Integer>();
resources.put("One", R.drawable.ic_image_1);
resources.put("Two", R.drawable.ic_image_2);
...
resources.put("Ten", R.drawable.ic_image_10);

Now, here there is a problem. While you can iterate each of these items and get them based on the key (name), you cannot access them with an index. Do not despair! There is a solution around it by using the entrySet() method which is offer with the LinkedHashMap. The entrySet() method returns a set view of the mappings contained in the map. Lets see how it can help us:

resourcesIndexed = new ArrayList<Map.Entry<String, Integer>>(resources.entrySet());

    @Override
    public void onBindViewHolder(MasonryView holder, int position) {
        holder.textView.setText(resourcesIndexed.get(position).getKey());
        holder.imageView.setImageResource(resourcesIndexed.get(position).getValue());
    }

As you can see, without creating a container, such as a class, we can use an index to obtain the information and keep track of each pair.

 

Share
Leave a comment

Android: Multi-threading UI and Database (Room)

Each time I need an application, I encounter that those publish never fit my needs. However, I am lucky! I can make them myself.

Recently, I decided to create an exercise app that fit my purpose. Therefore, I began developing for Android again.

A few months ago, my Microsoft Phone’s battery gave up and a massive deployment to production was coming which required me to be available; therefore, I purchased the first Android I could find. For those who wonder why I had a Microsoft Phone, I was developing apps using Universal Windows Platform using HTML5, JavaScript and the WinJS library. Pretty slick; however, there were bugs and poor designed features which made people drop the Windows Phone. No even Verizon Wireless support it. A shame

Anyways, you folk are not reading this post to listen to my poorly written stories but to find a solution to your problem such as dealing with messages as:

  • Only the original thread that created a view hierarchy can touch its views.
  • Cannot access database on the main thread since it may potentially lock the UI for a long period of time

These error messages are common when working with the UI and trying to do transactions with the database via Room.

In Short

For those who don’t have the time or patience here is the code I use more often from all the other solutions:

final Handler handler = new Handler();
(new Thread(new Runnable() {
    @Override
    public void run() {
        // DO DATABASE TRANSACTION
        handler.post(new Runnable() {
	   @Override
            public void run() {
                // DO UI STUFF HERE.
	    }
        });
    }
})).start();

Other Options

So far, this is the easier and straight forwards solution that have being working for me.

I tried with runOnUiThread:

runOnUiThread(new Runnable() {
    @Override
    public void run() {
		// Run code here
    }
});

Also, I used AsyncTask:

new DatabaseAsync().execute();

private class DatabaseAsync extends AsyncTask<Void, Void, Void>{
    @Override
    protected void onPreExecute(){
    super.onPreExecute();
        // Pre-operation here.
    }

    @Override
    protected Void doInBackground(Void... voids){
        //Perform database operations here.
        return null;
    }

    @Override
    protected void onPostExecute(Void aVoid){
    super.onPostExecute(aVoid);
        // Do UI operations here
    }
}

And used combinations of Thread and runOnUiThread:

new Thread(new Runnable() {
    @Override
    public void run() {
        // Database operation here
        try {
            runOnUiThread(new Runnable() {
                @Override
                public void run() {
                    // UI operation here
                }
            });
        } catch (Exception ex) {
            ex.printStackTrace();
        }
    }
}).start();

I even took a look into RxJava which is a “Java VM implementation of Reactive Extensions: a library for composing asynchronous and event-based programs by using observable sequences.”.

Conclusion

There are many ways to tackle this issue as you can see. The trick here is to understand how android handles threading and UI threading; however, such topics are for another post.

Share
Leave a comment

Cupid-4-Stupid for the NOOK – Comming Soon!

I was working on Cupid-4-Stupid for the Nook Color and Nook table for a while; however, there is a big difference between testing the application in the Nook emualtor and test the application in the real device.

After coming back from my trip to Argentina, I got a wonderful surprise. My friend David gave me a brand new Nook Color!

My first step was to do the registration at the Nook developer website (https://nookdeveloper.barnesandnoble.com/).

My second step was to obtain a file with the name ‘provision.cmd’. This file must be uploaded to the Nook Color in order to enable the developer mode.
The developer mode allows the ADB to detect the Nook Color and upload your application APK for testing.

To obtain the provision.cmd file normally you would go to the Developer Mode form inside the website (after login in).
You must fill the form with the serial number of your Nook and in return the form would give you a file provision.cmd.
Be aware that this file only enable your device for develop mode only for 180 days. After you must repeat the process.

I must confess that this second step didn’t work for me. The Developer Mode form was not recognising my Nook Color’s serial number.
It took me two weeks to obtain this file. First, I chat with technical support. Technical support provide me a 1-800 number.
I called the 1-800 number. I have to talk with four people until someone understood that I was trying to test my application on the Nook instead of trying to root (hack) the device.
The last person provide me an email: nookdevelopertech@bn.com
After going back and forward, they were nice enough to send me the file I needed.
I hope that now the Developer Mode form is working properly in case I need to do more testing in 180 days.


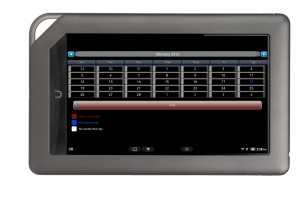
Here are some pictures of how the application is looking in the Nook Color:


Share
Leave a comment

Dealing with WebView for Android

In the application Cupid-4-Stupid that I and my partner David W. Corrigan developed, we notice that WebView stopped working properly.
When WebView stopped working as before, two important sections of our application were affected: Date Ideas and Panic Button.

I was getting exceptions such as NullPointerException produced by android.webkit.WebViewDatabase.getInstance() at WebViewDatabase.java.
After fixing this issue, we encounter other exceptions produced by CookieSyncManager.createInstance(Context) and more.

However, after doing some research, we managed to pin point the issue and fixed.

The following is a tutorial about how to create your own browser using WebView and make it work:
We assume that the browser is going to be an activity that will be called from another activity; however, that doesn’t mean that it cannot be your main activity if you wish.

  1. In your AndroidManifest.xml:
    1.  Add the following code before or after the ‘application’ tag:
      <uses-permission android:name='android.permission.INTERNET' />
    2. Next, add your browser activity tag.
      <activity android:name='com.hourglass.applications.BrowserActivity'
          android:theme='@android:style/Theme.NoTitleBar'>
      	<intent-filter>
      		<action android:name='com.hourglass.applications.Browser' />
      		<action	android:name='android.intent.action.VIEW' />
      		<category android:name='android.intent.category.DEFAULT' />
      		<data android:scheme='http' />
      	</intent-filter>
      </activity>
  2. Create the layout for your browser.
    Notice that we identify the root linear layout as ‘linearLayoutRootWebView’ and our WebView as ‘webview’. Both ids are important.

    <?xml version='1.0' encoding='utf-8'?>
    <LinearLayout android:id='@+id/linearLayoutRootWebView' xmlns:android='http://schemas.android.com/apk/res/android'
        androidShockrientation='vertical'
        android:layout_height='fill_parent'
        android:layout_width='fill_parent'
        android:background='@android:color/white'>
    
    	<WebView android:id='@+id/webview'
    	android:layout_width='fill_parent'
    	android:layout_height='fill_parent'></WebView>
    
    </LinearLayout>
  3. In your main activity under onCreate() method, add the following line at the end:
    This is part of the solution to solve the exception created by CookieSyncManager.createInstance(Context).

    CookieSyncManager.createInstance(this);
  4. Here is the most important part, your browser activity:
    First, you should notice that we added CookieSyncManager.getInstance().startSync(); inside onResume() method, and CookieSyncManager.getInstance().stopSync(); inside onStop() method. Again, this is to prevent the exception created by CookieSyncManager.createInstance(Context). Plus, using this method makes the loading of our pages more efficient.
    Second, the method setUpWebView() is the most important part. We tried using webview = (WebView) findViewById(R.id.webview); and other examples; however, replacing the webview provided by the resources by a webview generated by code seems to work and not generate any exceptions.

    package com.hourglassapplications;
    
    import android.app.Activity;
    import android.app.ProgressDialog;
    import android.content.DialogInterface;
    import android.content.DialogInterface.OnCancelListener;
    import android.os.Bundle;
    import android.view.KeyEvent;
    import android.view.View;
    import android.view.ViewGroup;
    import android.view.Window;
    import android.webkit.CookieSyncManager;
    import android.webkit.WebChromeClient;
    import android.webkit.WebView;
    import android.webkit.WebViewClient;
    import android.widget.Button;
    
    public class BrowserActivity extends ActivityWithMenu {
    	private static final String TAG = 'BrowserActivity';
    	final Activity activity = this;
    	private static ProgressDialog progressBar;
    	private ViewGroup viewGroupRootWebView;
    	private View viewToRemove;
    	private WebView webview;
    
    	@Override
    	public void onCreate(Bundle savedInstanceState) {
    		super.onCreate(savedInstanceState);
    		this.getWindow().requestFeature(Window.FEATURE_PROGRESS); // Must be called before setContentView
     		setContentView(R.layout.browser);
    		setUpWebView();
    		loadUrl(getIntent().getData().toString());
      	}	
    
    	private void setUpWebView(){
                    // Identify the webview provided by the resources and replace it with a webview generated by code
    		viewGroupRootWebView = (ViewGroup) this.findViewById(R.id.linearLayoutRootWebView);
    		viewToRemove = viewGroupRootWebView.findViewById(R.id.webview);
    		int indexView = viewGroupRootWebView.indexOfChild(viewToRemove);
    
    		webview = new WebView(this);
    		setUpWebViewSettings();
    
    		viewGroupRootWebView.removeView(viewToRemove);
    		viewGroupRootWebView.addView(webview, indexView);
    	}
    
    	private void setUpWebViewSettings(){
    		webview.getSettings().setJavaScriptEnabled(true);
    		webview.getSettings().setBuiltInZoomControls(true);
    		webview.setScrollBarStyle(WebView.SCROLLBARS_INSIDE_OVERLAY);
    		webview.setWebViewClient(newWebViewClient());
    		webview.setWebChromeClient(newWebChromeClient());
    	}
    
    	private WebChromeClient newWebChromeClient(){
    		return new WebChromeClient() {
    			public void onProgressChanged(WebView view, int progress){
    				activity.setTitle('Loading...');
    				activity.setProgress(progress * 100);
    				if(progress == 100){
    					activity.setTitle(R.string.app_name);
    				}
    			}
    		};
    	}
    
    	private WebViewClient newWebViewClient() {
    		return new WebViewClient(){
    			@Override
    			public void onReceivedError(WebView view, int errorCode, String description, String failingUrl){
    				Log.e(TAG, 'onReceivedError(..., ' + errorCode + ', ' + description + ', '+ failingUrl + ')');
    			}
    
    			@Override
    			public boolean shouldOverrideUrlLoading(WebView view, String url) {
    				view.loadUrl(url);
    				return true;
    			}
    
    			@Override
    			public void onPageFinished(WebView view, String url) {
    				if (progressBar != null && progressBar.isShowing()) {
    					progressBar.dismiss();
    				}
    			}
    
    		};
    	}
    
            private void loadUrl(String strUrl){
                setUpProgressBar();
                webview.loadUrl(strUrl);
           }
    	@Override
    	public boolean onKeyDown(int keyCode, KeyEvent event) {
                    // If there is a web page history, go to the previous page, else follow up the system behavior
    		if ((keyCode == KeyEvent.KEYCODE_BACK) && webview.canGoBack()) {
    			webview.goBack();
    			return true;
    		}
    		return super.onKeyDown(keyCode, event);
    	}
    
    	private void setUpProgressBar(){
    		progressBar = new ProgressDialog(this);
    		progressBar.setCancelable(true);
    		progressBar.setOnCancelListener(progressBarOnCancelListener);
    		progressBar.setMessage('Loading...');
    		progressBar.show();
    	}
    
    	private final OnCancelListener progressBarOnCancelListener = new OnCancelListener() {
    		@Override
    		public void onCancel(DialogInterface arg0) {
    			if (progressBar != null && progressBar.isShowing()) {
    				progressBar.dismiss();
    			}
    
    		}
    	};
    
    	@Override
    	public void onResume(){
    		super.onResume();
    		CookieSyncManager.getInstance().startSync();
    	}
    
    	@Override
    	public void onStop(){
    		super.onStop();
    		CookieSyncManager.getInstance().stopSync();
    	}
    
    	@Override
    	public void onDestroy(){
    		super.onDestroy();
    		webview.destroy();
    	}
    }

Let me know if you encounter a problem.

Share
Leave a comment